在前面一篇博文中学习到了直接调用HDFS提供的API接口来进行相关的操作,具体查看HDFS客户端API操作这篇博客。如果想要自己去实现上述博客中所实现的操作,不用API操作该如何去实现呢?这篇博客就是通过IO流的方式实现数据的上传和下载。
1. 开启HDFS
打开终端连接服务器,开启HDFS,在hadoop102服务器具体输入如下指令:
[zohar@hadoop102 hadoop-2.7.2]$ start-dfs.sh
在hadoop103服务器上打开yarn,具体指令如下:
[zohar@hadoop103 hadoop-2.7.2]$ start-yarn.sh
2. HDFS文件上传
将本地文件上传到HDFS之中,具体代码如下:
/**
	 * 通过IO流方式,把本地文件上传到HDFS文件系统
	 * @throws URISyntaxException
	 * @throws InterruptedException
	 * @throws IOException
	 */
	@Test
	public void putFileToHDFS() throws IOException, InterruptedException, URISyntaxException {
		// 1. 获取对象
		Configuration conf = new Configuration();
		FileSystem fs = FileSystem.get(new URI("hdfs://hadoop102:9000"), conf, "zohar");

		// 2. 输入流
		FileInputStream fis = new FileInputStream(new File("G:/testio.txt"));

		// 3. 输出流
		FSDataOutputStream fos = fs.create(new Path("/testio.txt"));

		// 4. 输入输出流相互拷贝
		IOUtils.copyBytes(fis, fos, conf);

		// 5. 关闭流
		IOUtils.closeStream(fos);
		IOUtils.closeStream(fis);
		fs.close();
	}
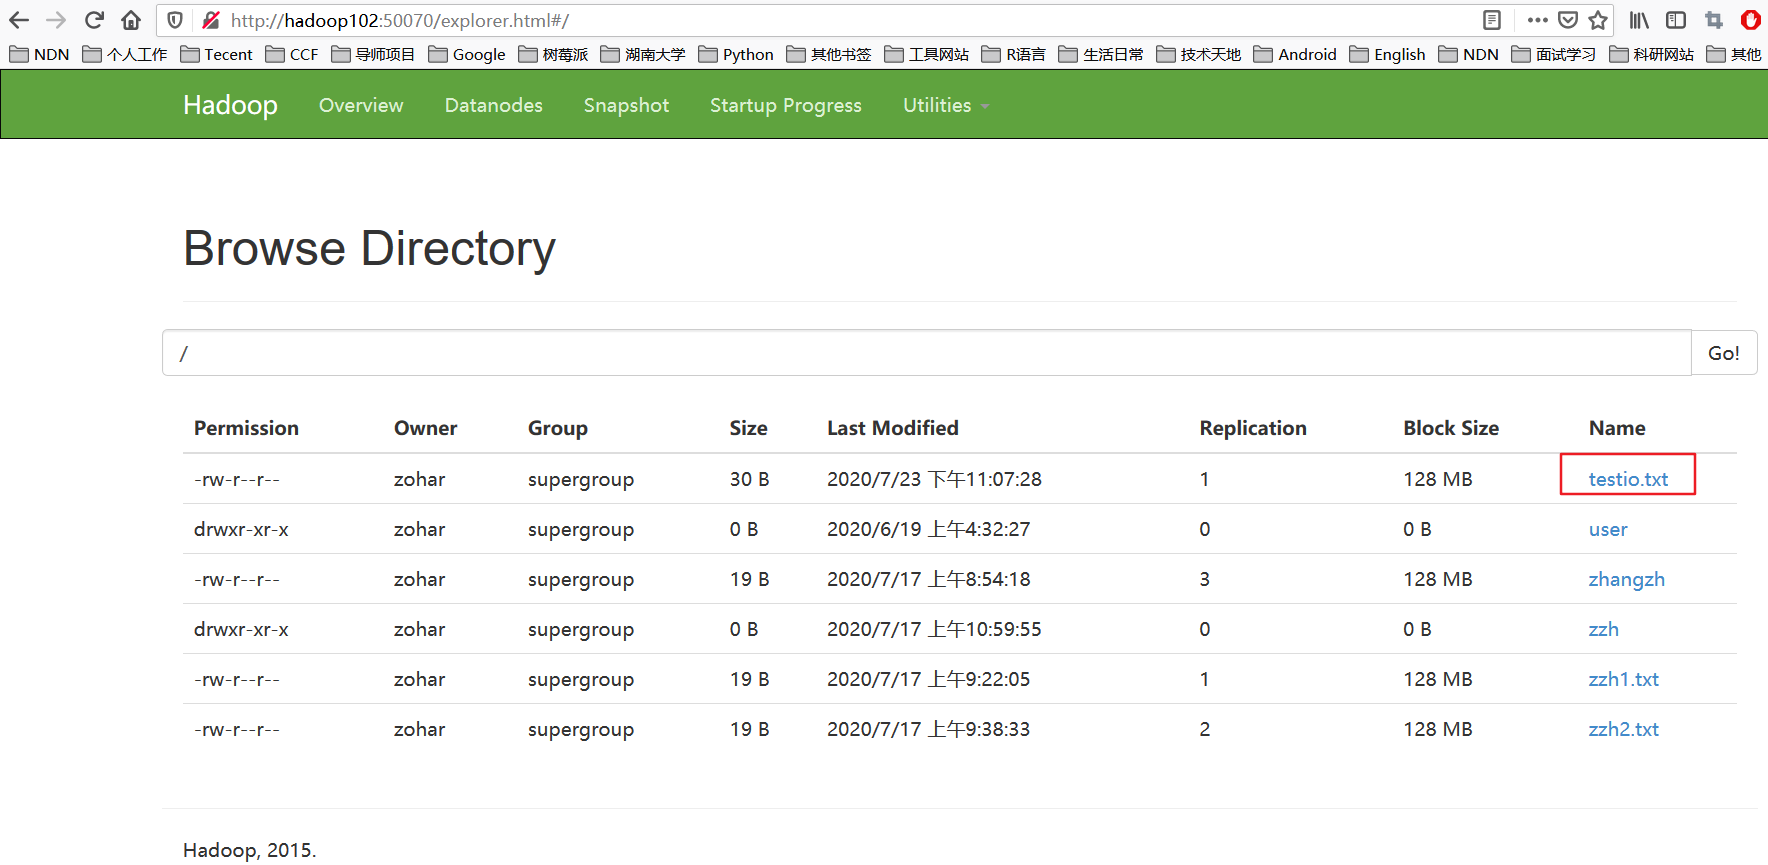
打开浏览器,可以查看到文件上传成功了,如下图所示。
3. HDFS文件下载
这部分内容就是将HDFS文件下载到本地中,这里就是将上一部分HDFS文件上传的文件下载到本地,首先先把本地的这个文件删除了,看看是否下载下来了。
具体代码如下:
@Test
	/**
	 * 通过IO流的方式,从HDFS从下载内容到本地客户端
	 *
	 * @throws IOException
	 * @throws InterruptedException
	 * @throws URISyntaxException
	 */
	public void getFileFromHDFS() throws IOException, InterruptedException, URISyntaxException {
		// 1. 创建配置对象
		Configuration conf = new Configuration();
		FileSystem fs = FileSystem.get(new URI("hdfs://hadoop102:9000"), conf, "zohar");

		// 2. 输入流
		FSDataInputStream fis = fs.open(new Path("/testio.txt"));

		// 3. 输出流
		FileOutputStream fos = new FileOutputStream(new File("G:/testio1.txt"));

		// 4. 流互拷贝
		IOUtils.copyBytes(fis, fos, conf);

		// 5. 关闭流对象
		IOUtils.closeStream(fos);
		IOUtils.closeStream(fis);
		fs.close();
	}
可以查看电脑中是否有将该文件下载下来了。
4. 定位文件读取
分块读取HDFS上的大文件,比如根目录下的/hadoop-2.7.2.tar.gz。
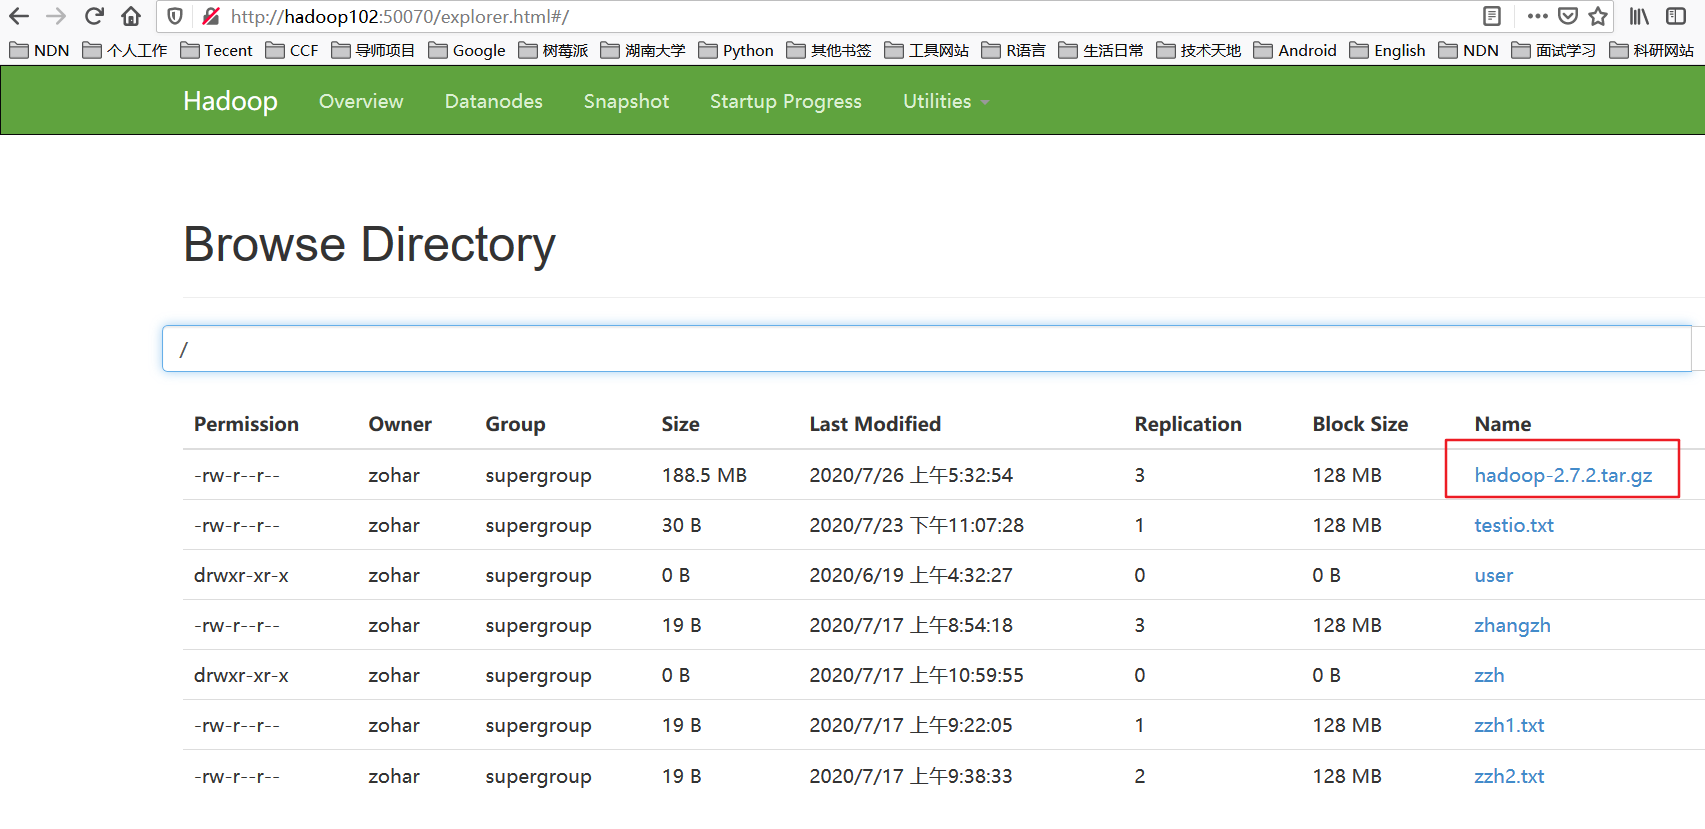
这里先查看根目录下是否有这个文件,如果没有先把服务器上面的这个文件上传至HDFS。在终端输入下面命令,将大文件上传到HDFS。
[zohar@hadoop102 hadoop-2.7.2]$ hadoop fs -put /opt/software/hadoop-2.7.2.tar.gz /
打开浏览器就可以查看到这个文件成功上传到HDFS中了。
4.1. 第一块文件下载
这里先把第一块文件128M下载下来,具体代码如下:
@Test
	/**
	 * 下载第1块内容
	 */
	public void readFileSeek1() throws IOException, InterruptedException, URISyntaxException {
		// 1. 获取对象
		Configuration conf = new Configuration();
		FileSystem fs = FileSystem.get(new URI("hdfs://hadoop102:9000"), conf, "zohar");

		// 2.获取输入流
		FSDataInputStream fis = fs.open(new Path("/hadoop-2.7.2.tar.gz"));

		// 3. 获取输出流
		FileOutputStream fos = new FileOutputStream(new File("G:/hadoop-2.7.2.tar.gz.part1"));

		// 4. 流的互拷贝(这里只拷贝指定大小的数据流128M)
		byte[] buffer = new byte[1024];
		for (int i = 0; i < 1024 * 128; i++) {
			fis.read(buffer);
			fos.write(buffer);
		}

		// 5. 关闭资源
		IOUtils.closeStream(fos);
		IOUtils.closeStream(fis);
		fs.close();
	}
4.2. 第二块文件下载
/**
	 * 下载第2块资源
	 * @throws URISyntaxException
	 * @throws InterruptedException
	 * @throws IOException
	 */
	@Test
	public void readFileSeek2() throws IOException, InterruptedException, URISyntaxException {
		// 1. 获取对象
		Configuration conf = new Configuration();
		FileSystem fs = FileSystem.get(new URI("hdfs://hadoop102:9000"), conf, "zohar");

		// 2. 获取输入流
		FSDataInputStream fis = fs.open(new Path("/hadoop-2.7.2.tar.gz"));

		// 3. 指定输入流读取位置
		fis.seek(1024*1024*128);

		// 4. 获取输出流
		FileOutputStream fos = new FileOutputStream(new File("G:/hadoop-2.7.2.tar.gz.part2"));

		// 5. 流的互拷贝
		IOUtils.copyBytes(fis, fos, conf);

		// 6. 关闭资源
		IOUtils.closeStream(fos);
		IOUtils.closeStream(fis);
		fs.close();
	}
4.3. 合并文件
运行上面的两段代码就可以考虑合并该文件成一个文件,因此上面是将一个文件进行切分,分为两个部分进行传输的。下面将两部分内容在Windows系统下进行合并。
在Windows命令窗口中进入到目录G:\,也就是两个文件所在的目录,然后执行下面的指令,对数据进行合并:
G:\>type hadoop-2.7.2.tar.gz.part2 >> hadoop-2.7.2.tar.gz.part1
合并完成之后,将hadoop-2.7.2.tar.gz.part1重命名为hadoop-2.7.2.tar.gz,然后通过解压软件解压,即可发现该文件和下载下来的文件非常完整。